How to adjust the blade height of CT50
Why the blade height adjustment is necessary ?
After replacing the Cleaver Blade or the Clamp Arm, the blade height might become higher or lower from adequate one.
Higher or lower blade position causes bad cleaving quality.
To keep good cleaving quality, blade adjustment is necessary.

The right time of the blade height adjustment
- After replacing the Cleaver Blade
- After replacing the Clamp Arm
- In case of bad cleave angle even though you cleaned the clamp rubber, the anvil and the Cleaver Blade
- In case of bad cleave angle even though you rotated the Cleaver Blade

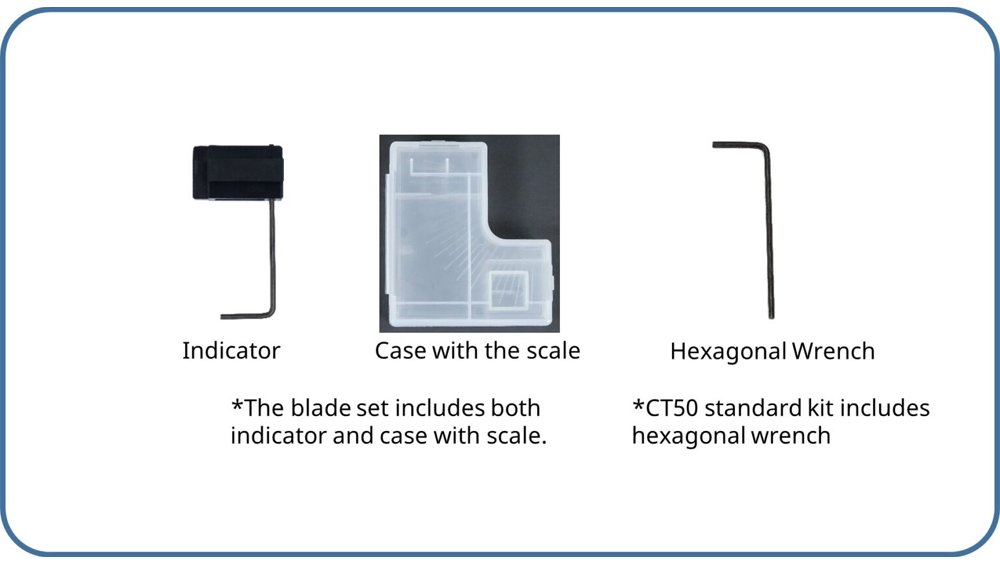
Necessary items to adjust the blade height for CT50
How to adjust the blade height adjustment
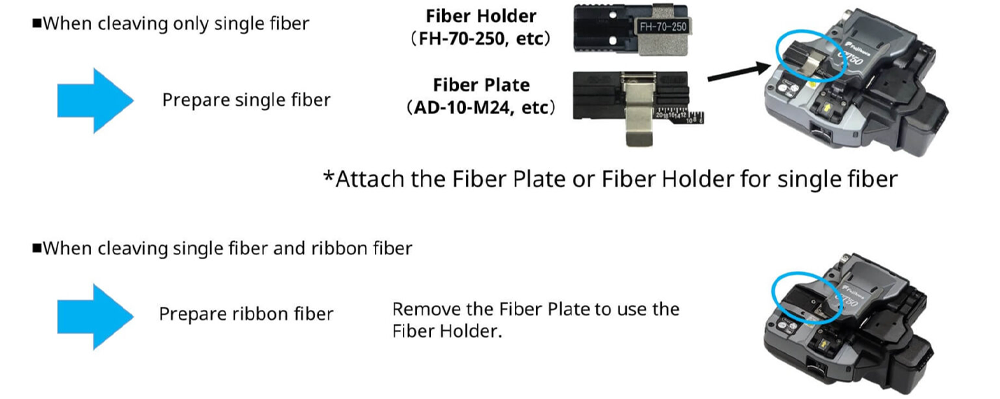
Select optical fiber
→Please select the optical fiber that you use from the following.
Confirmation before blade height adjustment
Confirm the following before starting the blade height adjustment.
| Check point | Countermeasure |
|---|---|
| The blade or the clamp arm is installed without rattling ? | Make sure that the screws shown as below are tightened. Cleaver Blade→Blade Rotary Wheel Clamp Arm→Shaft and Arm Cover 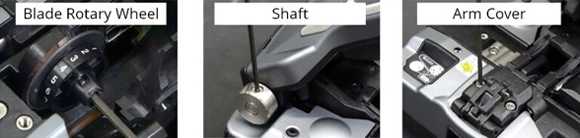 |
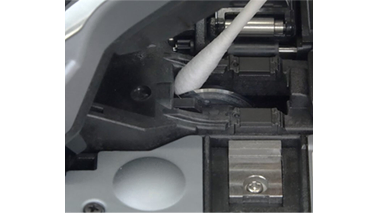
| There are no dust on the blade and clamp arm rubbers. | Clean them. |
| There are no scratches or chips on the clamp arm rubbers. | Replace the clamp arm, when you find scratches or chips. Refer to another video for the way how to replace. |
How to adjust the blade height
Blade height adjustment consists of 9 steps.
Let’s see step by step.

Pre-process
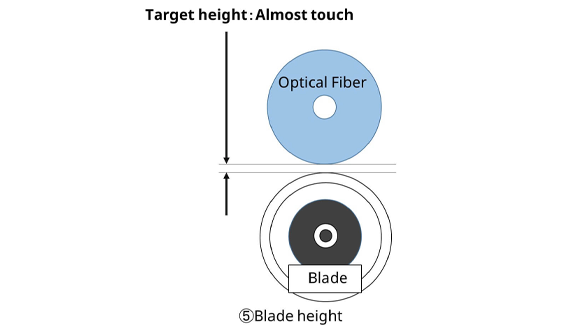
① Confirm the blade height dial.
→If you replaced cleaver blade, set the dial to the original position “L” or ”1”.
→In other case, you don’t need change it.
height dial to the initial position “L” or ”1”.

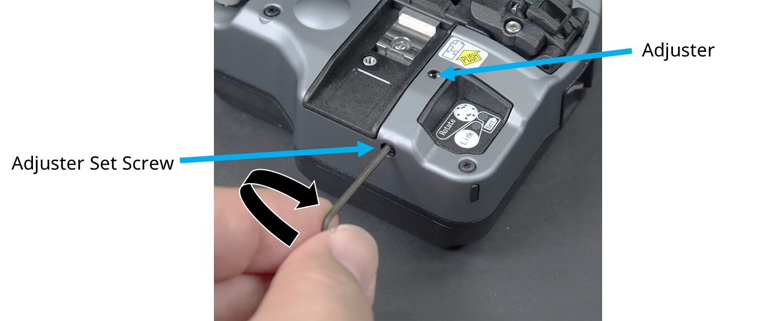
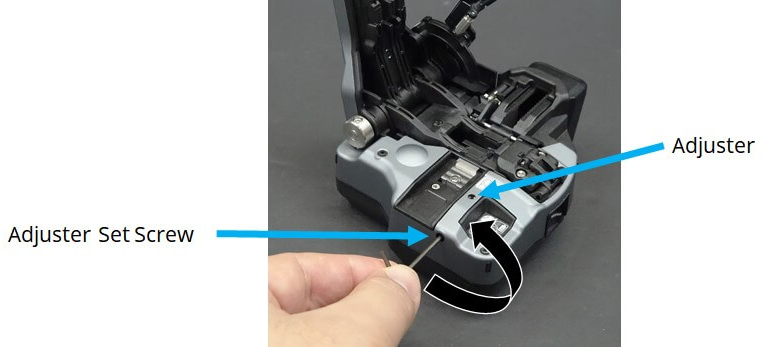
② Loosen the Adjuster Set Screw.(approximately 180 degrees counterclockwise)
*Do not loosen the screw over 180degrees, otherwise the screw may come off.
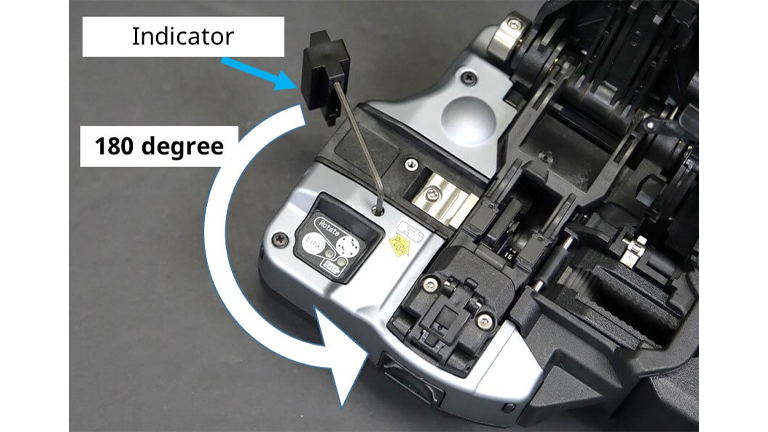
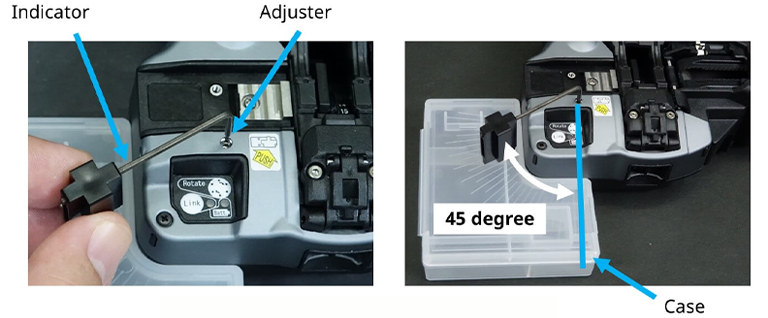
③ Rotate the Adjuster 180 degrees in counterclockwise with the indicator to set the blade lower.
④ Place the Case at the side of the cleaver. Then set the Indicator wrench into the Adjuster.
Please note the angle is approximately 45desgrees as below.
Blade height adjustment
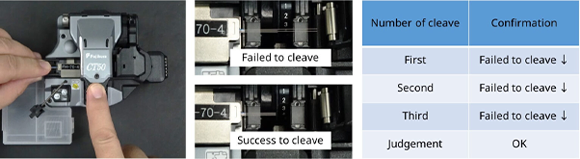
⑤ Move down Try until he blade height (the Cleaver Can’t cleave the fiber three times in a row)
with the Indicator inserted at an angle of 45 degree.
Set the fiber in the Cleaver and cut it three times in a row.
What is don’t cleave ・・・ Don’t cleave all at once
What is cleave ・・・・・ Cleave all at once
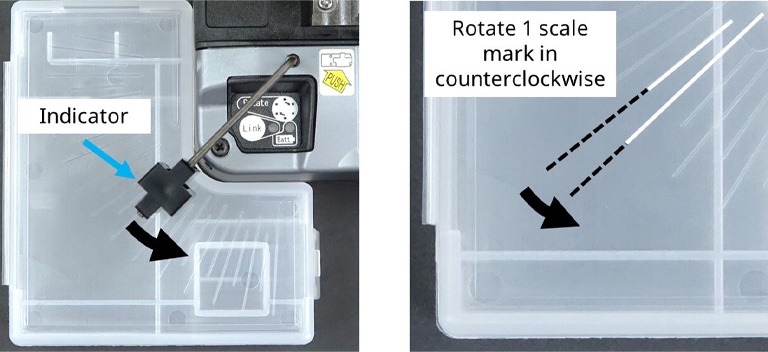
If the cleaver cleaves the fiber in even one of three times, rotate the Indicator counterclockwise by
one scale mark to lower the blade height until the cleaver can’t cleave the fiber three times consecutively.
again to the original position and continue the work.
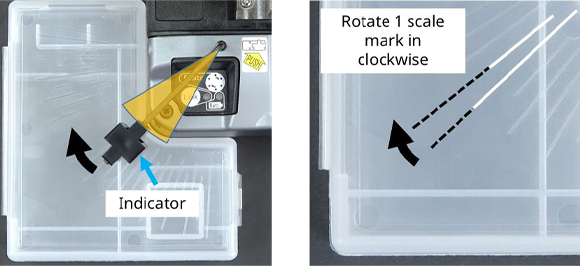
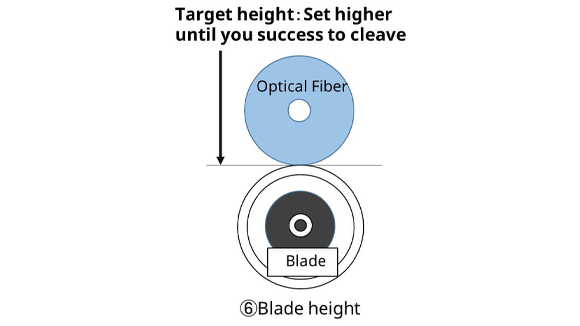
⑥ If the cleaver can’t cleave the fiber three times in a row, gradually rise the blade height to find
the best blade height. Rotate the Indicator clockwise by one scale mark to raise the blade height until
the cleaver can cleave the fiber three times consecutively.
If the cleaver can’t cut the fiber even once out of three times, raise the blade height by one scale and cleave
the fiber again three times in a row.
position and continue the work.
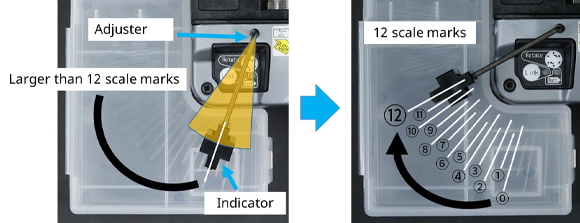
⑦ After the Cleaver can cleave three times continuously, remove the Indicator from the Adjuster once,
and set the Indicator at a position where it can be rotated by 12 scales in the direction of the arrow.
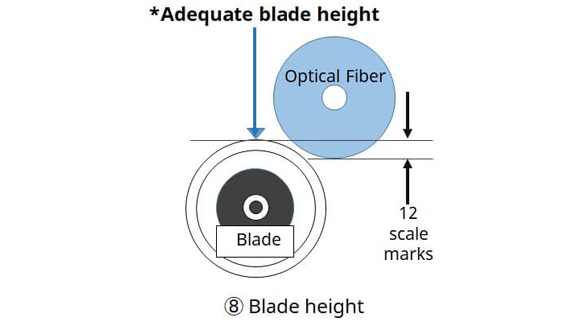
⑧ Rotate Indicator 12 scale marks in clockwise direction to raise the blade height.
⑦ Set the Indicator at a position where it can be rotated by 12 scales in the direction of the arrow.
⑧ Rotate Indicator 12 scale marks in clockwise direction.
Post-process
⑨ Tighten the Adjuster Set Screw with a hexagonal wrench.
Then, you can fix the adjuster and you completed all the process of adjusting blade height.